Let’s get real. birthday party organisers are fabulous but not every party needs to be a grand spectacle. Having a small party at home with close family and friends ranks equally, maybe even higher on the happy meter. Homemade food, your little one as the event host, why not beautify your home with decorations made by yourself from a scratch? It’s easy, clever and will lead you to wonder ‘Why didn’t I think of this before?’! Here are some ideas you can use.
1.Balloon backdrop
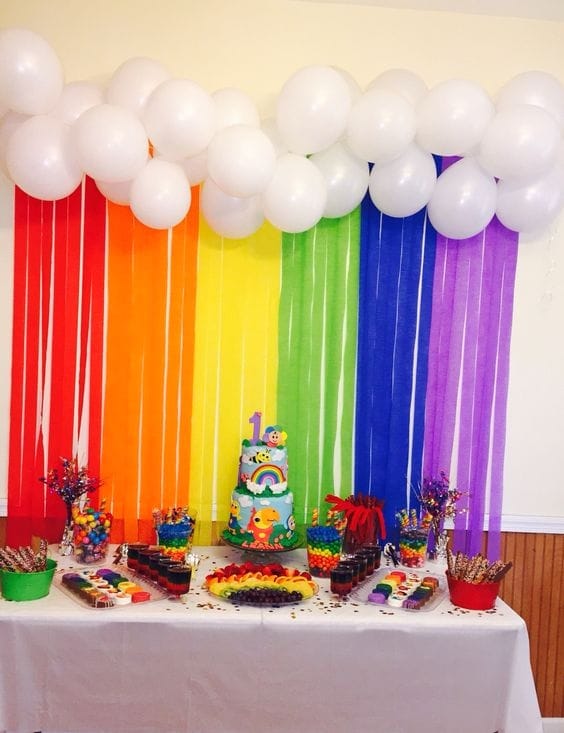
The heart of any birthday party is the cake. Place your cake table against a colourful and lively Balloon decoration at home with backdrops and your work is half done.
You need :
1. A packet of large assorted coloured balloons
2. Paper ribbons you can find at any stationary store
How to do it :
1. Cut the multi-coloured satin ribbons to (double it so it is sturdier) the size of the wall that will be used as the cake table backdrop.
2. Line them up next to each other in a vertical position with tape.
3. Next, blow up the balloons and tie up a set of three or five and tape them gently just above the satin ribbons. Bye bye dull, hello vibrant!
2.Photo banner
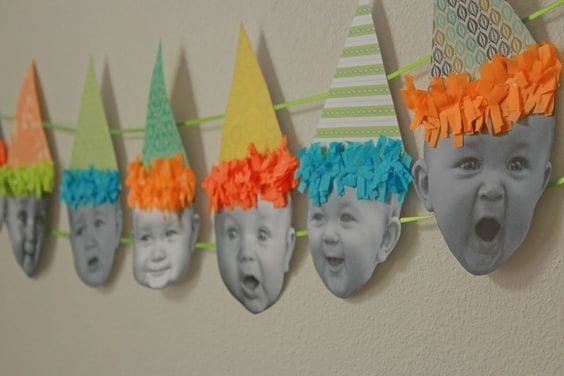
Make your child and the special people in her life feel special with this personalized photo banner idea.
You need :
1. Photos of your child and close people printed out on your home printer on A4 sheets
2. A nylon clothes wire
3. Plastic clips
How to do it :
There are two ways of doing this.
- You can simply tape the pictures on a wall that’s connected together with paper or satin ribbons to make a wall banner.
Or
- The second idea is the more adventurous one. Tie up the clothes wire from one end of the room to another (a little higher so no one bumps into it) and clip on the printed photos in chronological order so you can see the timeline of the child’s special moments.
3.Photo Booth
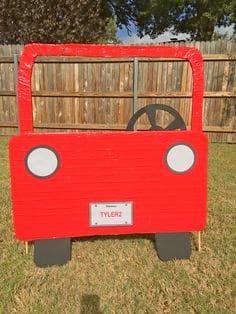
Big photo frames with ‘Happy birthday’ on them are fun but yawn, don’t we see them everywhere? Crank the coolness up several notches with this super smart crafty corner for kids idea of a ‘car photo booth for kids birthday party’. It may take a little more time than other ideas but it is totally worth it.
You need :
1. 2 large sheets of cardboard
2. Marble paper sheets of the same colour (a whole pack) and black marble sheets
3. Black tape
4. Thick paper plate
5. The cardboard tube of kitchen tissue paper roll
How to do it :
1. Trace the cardboard into the shape of the front of a car with a large rectangular space in the top middle for the windshield and cut it out with strong scissors or a pocket knife.
2. Cut out tyre shapes for the front two wheels and circles for two headlights.
3. Cut out a square to be used as the number plate.
4. Take the marble paper and cover the large cardboard that resembles the front of a car with it.
5. Wrap the wheels and the frame of the headlights with black marble paper.
6. Print out a number plate with a cute message and stick it on the cardboard.
7. Hold down the paper towel cardboard roll to the inside of the car with superglue and stick the paper plate (rolled with black tape around sides ) on top. Your steering wheel is ready!
Tip: You can raise this frame over two long sticks or two low height stools to give it a raised, vehicle like effect.
4.Food balloons
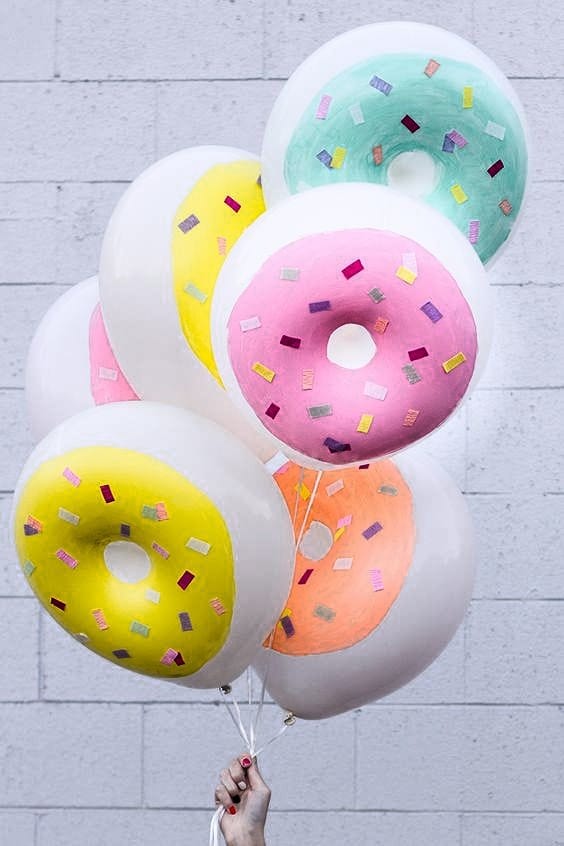
This one is a crowd pleaser and a favorite of little kids with chocolate fountain rental . Using balloons and paint you can creatively put up decorations related to food items that children love like icecreams, cupcakes, toffees and donuts and nothing pops more than a popcorn stall for birthday party.You could also get cotton candy stalls for birthday party, for a fun filled birthday celebrations.
You need:
1. Balloons
2. Paint
3. Long sticks
4. Chart paper
How to do it :
Donut-
1. Blow up white balloons to half their capacity.
2. Use paint to lightly paint a pink or brown circle around them and splatter colourful paint to resemble a donut with sprinkles.
3. Tape the sticks underneath or put them up on the walls.
Icecream cones
1. Cut brown cardboard paper and fold it into a cone. Tape it securely.
2. Blow small balloons to half their capacity and place on top of the cone. Stick it up or use tape so it won’t fly off.
5.Coloured glasses
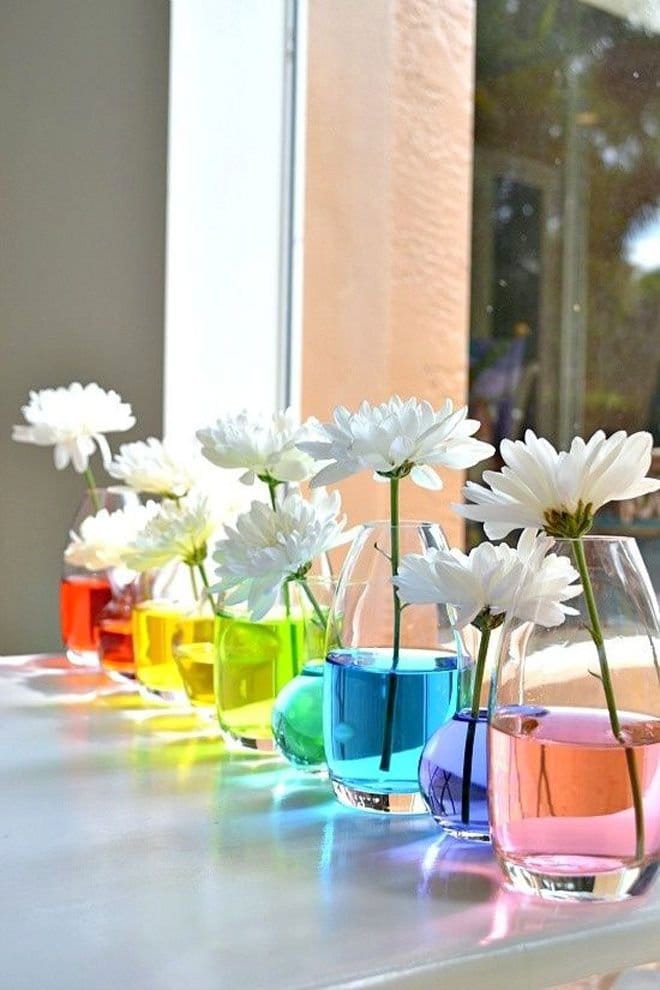
Classy, elegant and so thrifty – this hack is perfect for a birthday party for adults or slightly older kids.
You need:
1. A set of wine glasses
2. Assorted food colours
3. Fresh perfumed flowers
What to do :
1. Fill the glasses with water.
2. Put a drop of different food colour in each glass. It should be light so put just tiny drop.
3. Place a fresh flower inside.
4. Line them up on the table or in a place that’s visible to all.
5. Get ready to explain how it’s done to every guest!